 |
| The bump (bottom) and the rusty seam. |
No problem, I thought. I've converted my own panel van before. These things are simple to remove. Not so the Auto-Sleeper. In an effort to please the German makers of the van no doubt, the folk at Auto-Sleepers have over engineered the contents of the van to the extent that simply removing a few screws and driving the van over a few bumps, will not shake the interior free.
A first look had me completely baffled. I couldn't find any screws or obvious rivets that held things in place and no amount of shaking would reveal where the joins were. I phoned Auto-Sleepers and spoke to a bloke (who sounded like he made camper vans for a living) and he told me that I should be fine simply removing the cooker ,which would give me access to everything behind (simply removing the cooker...er..right). I also spoke to Paul at Vale Motors in Tewkesbury, who I bought the van from, and he suggested that I might need to remove the bed. As it turned out they were both partially wrong or partially right (depending on your personality type).
After another quick dig around inside, I realised that the soggy seam was behind a pillar inside the van, behind the bed. My assumption was that this pillar was shielding the seam so that any grinding or welding would not torch the insulation. There was only one way to find out. Remove the panelling behind the bed.
To do this, I had to first remove the strip of wood above the panel which seems to hold things together. This was quickly done by removing the screws which were rather cunningly hidden in the seam of the fabric.
 |
| Strip of wood (technical name alert) removed |
Once this was removed it was simply a case of finding other screws that held the panel to the side of the van. These are easy to locate. Simply work along the top of the fabric with a screwdriver and tap away until you find the screw heads. In most instances they are visible if you care to get a bit closer.
 |
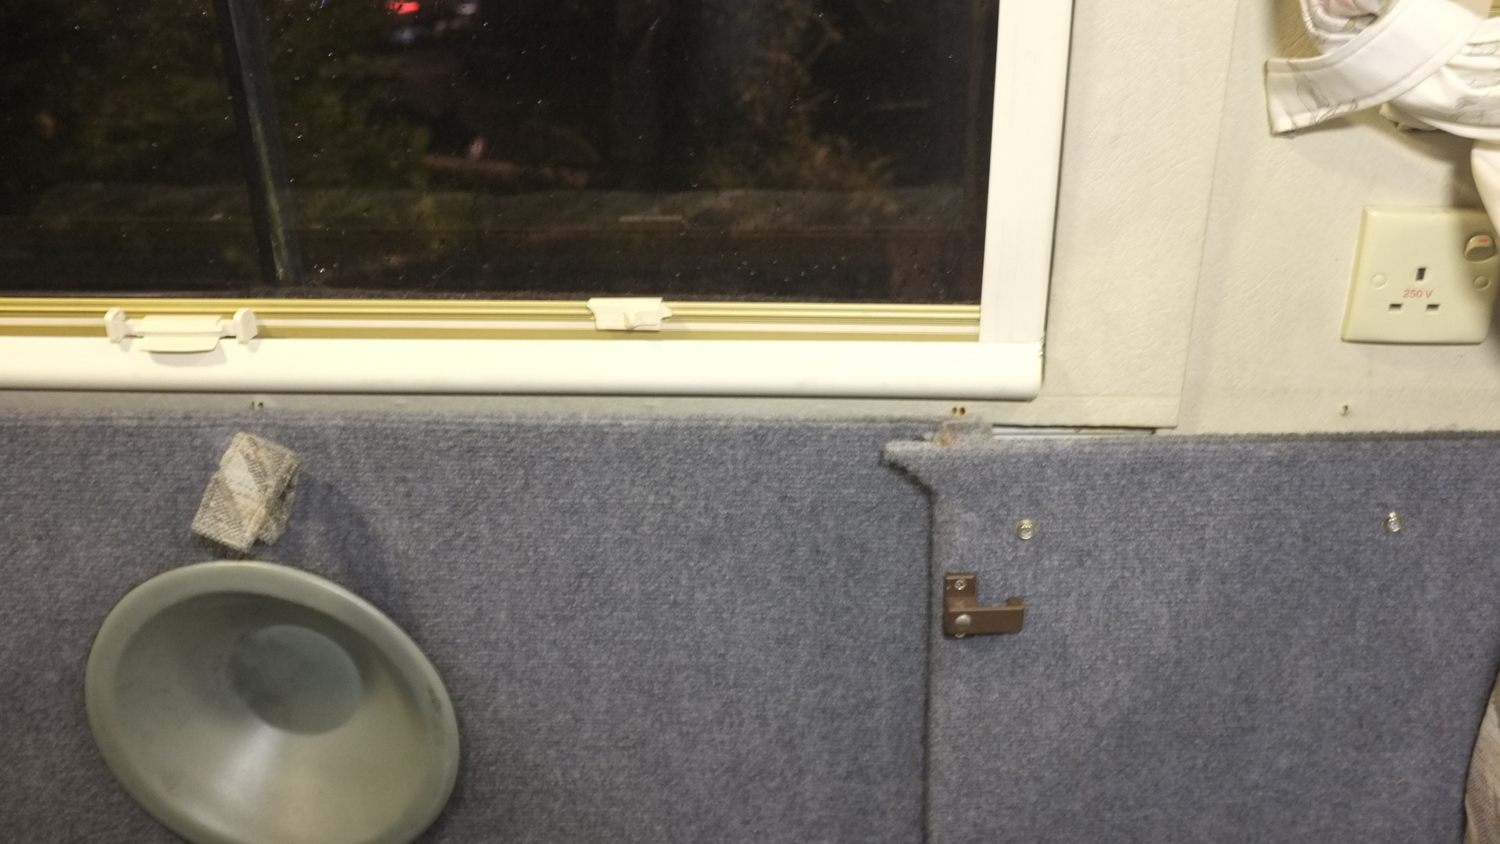
| The gap under the window where the strip of wood used to live |
Once these screws were removed, it was a simple enough job of hoiking the panel out to reveal the insulation and the pillar (behind which the offending seam is located).
As it turned out, the insulation in mine looked more like the lining of cheap Matalan jacket so I've added it to the list of things to replace.
 |
| Now you see it |
 |
| Now you don't |
As you can see from the picture, Auto-Sleepers appear to have sourced the insulation from Woolworths and consequently it hasn't really stood the test of time. The glue that holds it to the side of the van has all but disappeared and the insulation itself could do with an upgrade (I'm thinking foil wrapped recycled bottle tops which I used on my previous van and which worked very well).

It only remains to be seen if I can remove the rest of the insulation without removing the cooker. After a little digging, I think this is possible but have called it off for the evening as the light is fading, my torch is running out of battery and I need an ale to take the edge of things.
No comments:
Post a Comment